Showing posts with label Occasion Cake. Show all posts

Wednesday, May 16, 2018

Fruit Cake

Fruit Cake 
Original recipe taken from my Mom's friend 


10" round circle removable bottom tin (lined and greased with baking paper)

INGREDIENTS
1 pound butter (453g butter - room temperature) 
1 pound flour (453g flour)
2 teaspoons baking powder 
1/2 teaspoon salt 
1/2 teaspoon cinnamon powder (subtle; more if you want a stronger taste of cinnamon) 
8 egg yolks 
8 egg whites 
1 teaspoon apple cider vinegar (or cream tartar) 
1 pound brown sugar (I used only 1/2 pound = 226g and I think it's sweet enough) 
1 pound dried mix fruits (453g dried mix fruits)
100g liquor (I used my failed coffee liquor made from 40% vodka) 
2 oranges (require juice only) 
100g chopped walnuts (no need to pre-toast) 
4 tablespoons liquor (for brushing: I used failed coffee liquor) 

STEPS
  1. DAY 1: Squeeze out juice from 2 oranges. Remove seeds and any fiber. Soak dried mix fruits with orange juice. Refrigerate. 
  2. DAY 2: Pour 100g liquor to continue soaking the dried mix fruits (by this time, you will notice the fruits have almost fully absorbed all the orange juice). Refrigerate. 
  3. DAY 3: Little excess liquor left which is not absorbed by the dried mix fruits. It's okay. Put aside to be used later.
  4. Sieve flour, baking powder, salt and cinnamon powder a total of 3 times to make sure everything is well blended. Put aside. 
  5. Whisk egg whites with apple cider vinegar and approximately 3/4 of the brown sugar until you achieve medium-stiff peak. Put in freezer to chill while quickly prepare egg yolk batter. I chill it so that it won't deflate while I'm preparing egg yolk batter. I started off with egg white so that I don't have to wash the mixer when I'm preparing egg yolk batter.
  6. Cream butter and remaining 1/4 brown sugar until dissolved for about 5 minutes. 
  7. Add in egg yolks one by one and continue mixing. 
  8. Add in flour mixture and fold with spatula. The batter will look a little thick. 
  9. Fold in 1/3 of the egg white into the egg yolk mixture. It will require some effort as the mixture is a little stiff. Continue until all egg whites combine with egg yolk mixture (chiffon method). 
  10. Add in the soaked dried mix fruits and fold into the batter. 
  11. Add in walnuts and continue mixing for a while a more. 
  12. Pour cake batter into the baking tin. 
  13. Bake in preheated oven at 140 degree Celsius for 40 minutes. Then, continue baking at 160 degree Celsius for another 50 minutes. Skewer will come out wet/oily but no sticky crumbs. That means it is thoroughly cooked already. 
  14. Let cake cool for 10 minutes in the baking tin. 
  15. Poke small holes using a satay stick. 
  16. Using a straw, slowly insert the liquor into each hole. Brush remaining alcohol on the cake. 
  17. I served the cake after 2 days and it's still moist. 


Before baking


 After baking
The cake did rise a little
10" tall cake 
Brush alcohol on the surface lastly

Lots of small holes
Straw to insert alcohol 


I only removed the cake from the tin on the 2nd day when I'm about to serve it. 
I didn't manage to brush the sides so it's a little dry at the sides.


Thursday, September 21, 2017

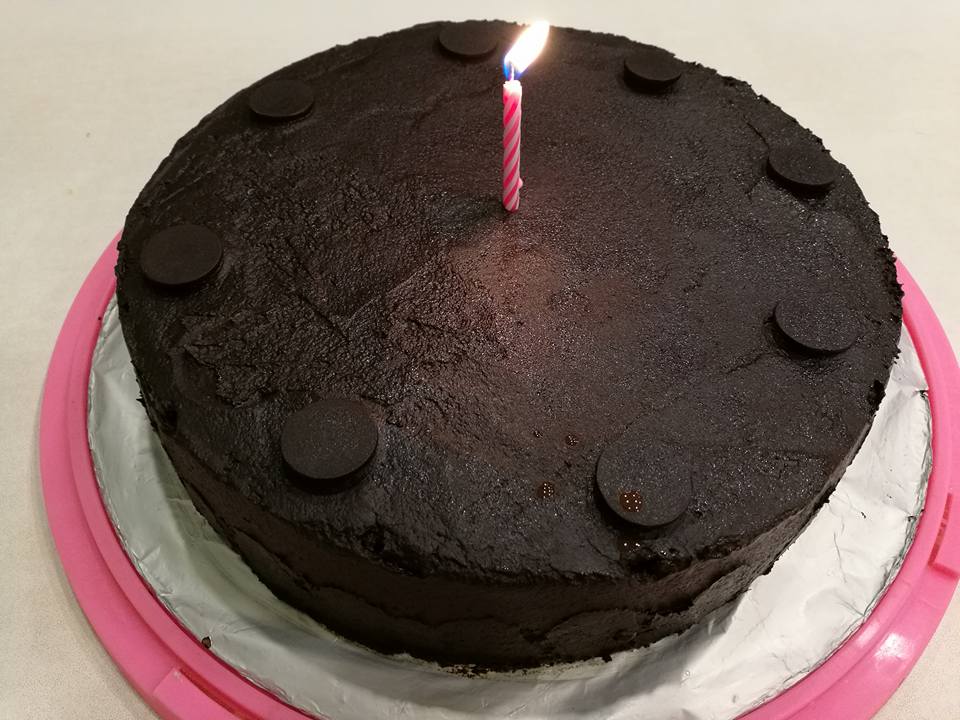
Chocolate Mud Cake

Chocolate Mud Cake


10" round removable bottom cake tin (lined with paper at the bottom only, greased)

INGREDIENTS: 
A
250g unsalted butter
250g semi-sweet chocolate (I used 75% Beryl dark chocolate couverture)
2 tablespoons instant coffee powder + 175g hot water 
350g brown sugar 

B
125g milk (25g milk powder + hot water to dissolve) 
4 eggs
30ml vegetable oil (I used canola cooking oil) 

C
1 teaspoon salt 
2 teaspoons baking powder
1/2 teaspoon baking soda 
300g all purpose flour (I used wheat flour)
55g cocoa powder 

STEPS:

  1. Grease a piece of baking paper to place at the bottom of the baking tin. 
  2. Double boil all ingredients A until melted. Remove from heat. 
  3. Add ingredients B, one by one into the mixture using electric whisk.
  4. Add in sieved ingredients C, mix well until everything is well combined. 
  5. Pour the cake batter into the cake tin. 
  6. Bake in preheated oven at 160 degree Celsius for 70-80 minutes (until toothpick comes out clean, cake feels compact upon touching). 
  7. Leave to cool for 5 minutes. 
  8. Use a knife to slide through the side and overturn the cake. Remove the baking paper at the bottom. Leave to cool completely. 
  9. Frost the cake with chocolate ganache. 
Chocolate Ganache 

Yields 1 cup
* For the 10" round chocolate mud cake, I made 1 and 1/2 of this recipe to cover the entire cake sufficiently, with no middle frosting. 

INGREDIENTS:
1/3 cup heavy cream (I used topping cream because my dark chocolate is really bitter)
1 teaspoon butter (I used hotel supply 25g butter cube) 
1/8 teaspoon salt (I omitted because I'm using salted butter)
4 ounces dark chocolate (I changed unit to ounces on my weighing scale)

STEPS:
  1. Boil heavy cream just right before it boils (I boiled mine and therefore my chocolate ganache is a little tacky looking). 
  2. Remove from heat. Add in chocolates. Let it sit there for 5 minutes without stirring or doing anything to it. 
  3. Then, stir the chocolate and add in butter and salt. Mix well until everything is well combined. 
  4. Chocolate ganache is ready to be used. 
NOTES:
  • This cake is extremely rich and heavy. Chocolate lovers will love this cake to death. Haha.. 
  • I am not sure how it's gonna taste like with other chocolates but 75% dark chocolate is definitely my choice. 
  • Make sure to serve the cake in room temperature. Otherwise, you will be serving rock to your guests. This cake butter content is quite high. So, by common sense and a little Science knowledge, butter gets hard when it is chilled in the fridge. So, always remove cake from fridge for an hour in room temperature before serving. Do not be mistaken with the cake being dry, crumbly and hard (this only happens when you put the cake in fridge and eat straight away).
  • I ruined my ganache because the temperature is too high but as you can see, it still spreads pretty well and the taste is still top notch.
  • A standard slice of this cake is really huge to keep you feeling full. Do not attempt to eat 2 slices! =) 
  • The aroma of the cake sitting next to me is driving me crazyyyyy.. Trust me, I can literally smell the chocolate aroma because the cake is beside me now. 
  • This is a really easy cake to make for beginners, people who do not like too much cream frosting, chocolate lovers and lazy people who want to get a fancy cake done without much effort. 
After melting ingredients A

Cake batter poured into the cake tin.
Before baking.
As you can see, the cake batter doesn't look very smooth and there's little areas where flour can be seen.
So I think it is best to use an electric whisk like recommended in the recipe.
I used hand whisk to make this.

The cracky cake after baked.

Let it cool for 5 minutes and remove cake from mold.


They do look like they are kinda dry.. but it is really very moist when you eat it.

The beautiful triangle cut when the cake is as hard as rock after getting out from the fridge. 
Wrong move! 

This is the cake that I ate half way.. 
Look at how moist and sinfully chocolatey the cake is.
All chocolate lovers will know how good this cake is simply by looking at its texture.
The darker, the better, yummmmmmm 


Wednesday, August 9, 2017

Steamed Chocolate Cheese Layer Cake

Steamed Chocolate Cheese Layer Cake


8 inches square removable bottom tin 

Cheese layer:
250g cream cheese (room temperature) 
50g sugar (I used brown sugar)
1 egg
1 tablespoon water
1 tablespoon all purpose flour (I used wheat flour)

Steps:
  1. Whisk cream cheese and sugar with a folk. 
  2. Add egg. Mix till well blended. 
  3. Put aside. 
Chocolate cake: 
3 eggs
1 1/2 cup sugar (I used brown sugar)
1 1/2 teaspoon vanilla extract
a pinch of salt
3/4 cup of boiling water
3/4 cup of milk 
3/4 cup of cooking oil 
1 1/2 cup of all purpose flour (I used wheat flour)
4 1/2 tablespoons of cocoa powder
1 1/2 teaspoon of baking soda
3/4 teaspoon of baking powder 

Steps:
  1. Sieve the dry ingredients: flour, cocoa powder, baking soda and baking powder. in a bowl. 
  2. Whisk eggs and sugar until ribbon stage.
  3. Add in vanilla extract and salt.
  4. Add in boiling water, milk and oil. 
  5. Add in the flour mixture. Mix well. Put aside.
Steaming process:
  1. Wrap the lid with cloth to prevent water vapour from dripping onto the cake later.
  2. Use medium fire. 
  3. Apply oil around the tin and layer a piece of baking sheet.
  4. TIPS: Weigh the chocolate batter with tin first. Then, calculate the half amount of the batter to be poured later. Put the baking tin on a weighing scale. Pour half of the chocolate batter into the tin. Cover with aluminium foil (I didn't do this).
  5. Steam for 20 minutes. 
  6. Pour in all the cheese batter on top of the chocolate cake. Cover with aluminium foil again (I didn't do this). 
  7. Steam for 15 minutes.
  8. Pour in the remaining of the chocolate batter on top of the cheese layer. Cover with aluminium foil once again (I didn't do this).
  9. Steam for 20 minutes.
  10. Open a small slit and let the hot air escapes. Let cake be in the steamer for 5 minutes after closing the fire. Then, remove the cake and let it cool completely before removing the cake from the mold. 
  11. I spread peanut butter ganache (no recipe, eyeball the quantity: dark chocolate, topping cream and peanut butter) on top of the cake and sprinkled marshmallow, biscuits and dark chocolates. 


Really rich and chocolatey taste cake. Easy to make, in contrast to the conventional cream style cakes. My 26th birthday cake. 

Tuesday, May 23, 2017

Carrot Cake

This year Mother's Day, I decided to bake carrot cake for my mom. So, 2017 Mother's Day cake - carrot cake.

Carrot Cake 

Original recipe uses two 9" round tins. 
I used two 7" round tins by making half of the original recipe. 

INGREDIENTS
CAKE
1 cup (130 grams) flour 
1 teaspoon baking soda 
1/2 teaspoon salt 
3/4 teaspoon ground cinnamon 
148 grams canola oil 
1/2 cup (100 grams) white sugar 
1/2 cup (100 grams) brown sugar 
* I substituted both 200g sugar with 175g brown sugar which is JUST NICE 
1/2 teaspoon vanilla extract 
2 eggs
1 1/2 cups of grated peeled carrots (150 grams)
1/2 cup (50 grams) coarsely chopped almonds/pecans/your choice of nuts
1/4 cup (30 grams) of raisins 

FROSTING
250 grams cream cheese 
20 grams butter
100 grams condensed milk
* I substituted 100g condensed milk with 50g condensed milk.  
1 tablespoon of lemon juice 
100g whipping cream
* I substituted 100g whipping cream with topping cream. 
NOTES:
  1. These are the measurements I used for the first time. However, on the first few bites, it tasted really sweet but later, it tasted fine. =/ After modifying, I think it is best to use 175g brown sugar for cake and 100g topping cream + 50g condensed milk for cream cheese frosting. 
  2. This batch of frosting is sufficient to make x2 of this recipe. One double layered 7 " cake, fully frosted. Second is single layered 8" square cake, top frosting.
  3. I tried the second time using 8" square tin and noticed that the cake is significantly shorter. Unsure if the cake is too dense to rise a little on its own or the size is indeed much larger and hence resulting in a shorter cake. So, I think it is still recommended to use two 7" round cake tins for best result. 
  4. I made this cake, frosted with cream cheese 2 days in advanced and the cake still tasted moist and soft. 
STEPS
  1. Line bottom of the tins with baking paper. Grease lightly the bottom and around the sides of the tins.
  2. In a medium bowl, whisk flour, baking soda, cinnamon and salt till well combined.
  3. In a separate bowl, whisk oil, sugar and vanilla extract until combined. 
  4. Whisk in eggs one at a time till fully combined.
  5. Fold in flour 1/3 at a time, slowly, till everything well incorporated. 
  6. Switch to a spatula, mix in carrots, nuts and raisins. Fold well into the cake batter.
  7. Divide batter into half and pour into each tin. 
  8. Bake at 160 degree Celsius in preheated oven for approximately 25 - 30 minutes for two 7" round cakes. 
  9. Remove cake from oven and let them cool down for 15 minutes.
  10. Overturn cakes on cooling racks and remove the paper on the bottom. Cool completely. 
  11. FROSTING: Whisk all ingredients except whipping cream until well combined. Add in whipping cream and whisk till it forms a smooth cream. 
  12. Frost your cake as desired. 
  13. Refrigerate your cake. Serve. 
The ingredients 

Whisk sugar, oil and vanilla
This cake really uses A LOT of sugar.. 


After adding eggs 

Then flour and the other dry ingredients.

Add in carrots, nuts and raisins.


Into the cake tins 

I can't really tell if the cake did rise a little or not.. 

From the sides

Decorated with roasted almond and macadamia nuts

Side view

Sliced carrot cake after 2 days. 


Friday, November 4, 2016

Hi-Fiber Cheesecake

Hi-Fiber Cheesecake 


9" loose base tin 
* I used 7" loose base tin (hence, my cake is a little tall, exactly the height of the cake tin) and reduced the recipe to half. 
If you have 8" tin, it should be perfect. You can yield larger but shorter cake. 

INGREDIENTS
  • BASE: 
  • 100gm oats
  • 80gm cornflakes (crushed) (I used bubble rice) 
  • 100gm raisins (I used dates) 
  • 3 tbsp brown sugar (I used 1 1/2 tbspn cuz I used dates) 
  • 125gm butter 
  • 1 tbsp honey/golden syrup (I used honey) 

  • FILLING: 
  • 750gm cream cheese (room tempeature)
  • 100gm brown sugar
  • 170gm honey/golden syrup (I used honey) 
  • 1 1/2 tsp vanilla extract
  • 30gm corn starch
  • 300gm UHT whipping cream
  • 4 eggs (beaten)
  • 80gm wheat germ (toasted) (I used quick oats) 
  • 100gm pistachios/walnuts (chopped coarsely) (I used pecans) 

  • TOPPING: 
  • 80gm multi grains (mixture of wheat germ,oats,cornflakes,raisins) (I used oats, sunflower seeds, bubble rice) 
  • 2 tbsp brown sugar 
  • (Mix all together)

STEPS: 
  1. Place oat and bubble rice in a plastic bag. Smash finely using rolling pin. 
  2. Melt butter in a pot. While liquid butter is hot, add raisins and brown sugar and stir till melted. 
  3. Mix in all the other base ingredients into the pot. Mix well. 
  4. Grease the cake tin with butter. 
  5. Place (3) on the bottom and flatten with the back of the spoon. 
  6. Bake the crust until you can see the edges leave the tin a little). I used Morgan's air fryer and it took about 15 minutes 160 degree Celsius). Leave aside to cool. 
  7. Whisk cream cheese, brown sugar, honey and vanilla extract for 3-5 minutes. 
  8. Add eggs and UHT cream. Continue whisking. 
  9. Add corn starch. Continue whisking.
  10. Stir in wheat germ and nuts using a spatula. 
  11. Pour the filling mixture (10) into the tin. 
  12. Mix all together topping ingredients and sprinkle on top of the cheese filling. 
  13. Steam bake 180 degree Celsius for 1 hour - 1 hour and 30 minutes. 
NOTES
  • I only preheated my oven at 150 degree Celsius 5-10 minutes before I put the cake tin into it. 
  • I changed the temperature to 170-180 degree Celsius when baking the cake cuz the cake is tall and I'm afraid it might not cook well. I baked it up to 1 hour + I guess you can take it out when you feel the cake has firmed up instead of jiggling. 
  • The sad part about this cake is that the topping makes the cake kinda messy when you slice the cake. 
Overall, my friends say it tastes just nice, not to sweet. Dad says it is a little sweet. So maybe, the sugar can be reduced a little bit. 8" loose base tin should do fine. I only have 7" one and the cake did rise a little after baked. It left 1 inch before it reaches the top of the tin.


I ate a few pieces already and gah - I go to the toilet quite often. 
So true as its name says.


Friday, October 21, 2016

Blueberry Cake (Modified into Dragon Fruit Cake)

Blueberry Cake 
(Modified into Dragon Fruit Cake) 
Original recipe taken from https://www.youtube.com/watch?v=DC_Kz5DZt5M&index=7&list=PLJj06SbMAVqPv389tjtSWr9RqauGN6eKo 


Ingredients: 7 inch round cake pan

For the base:
30g almond
40g rolled oats (replaced with quick oats)
30g oil
30g dates (used around 3 honey dates)

For the filling:
150g cashew nuts
100g blueberry (replaced with dragon fruit)
130g sweetener (used 100g brown sugar; it can still be reduced further, a little too sweet for me)
200g coconut milk (replaced with soy milk)
200g water
1 1/2 tsp agar powder(there's no substitution for this as this is coagulant)
2 tbsp kudzu starch(you could use other kind of starch or even skip this. starch gives a kind of chewy texture)

200g bluberry (dragon fruit)


Instructions:

1. put all the ingredients of the base into a container of food processor and blend well.
2. put the mixture in a cake pan evenly. bake at 350F/180C for 15 min.
3. put all the ingredients of the filling together and blend with high powder blender.
4. gently heat the mixture up with low to medium heat until it thickens.
5. place another 200g blueberries on the base then pour the filling mixture.
6. leave in a fridge for a few hours.


This is a vegan recipe. The only thing I don't like about vegan recipe is that it uses a lot of nuts which makes the cost of the ingredients much higher than standard non-vegan recipes. =(

I decided to try out this recipe after watching several amazing videos done by Ryoya, the Japanese vegan guy on Youtube. No one seemed to have tried his recipe before so I decided to try it. I think his recipe is going to be too sweet for me. Luckily I reduced the sugar 30g. Yet, I think it is still a little too sweet. 

It is difficult to resist myself from getting a second bite. The crust tastes really good. The filling is special. Maybe it's a little too sweet so I don't really fancy it that much.. Overall, everything tastes like blended altogether very well. Luckily soy milk replacing coconut milk does not make the cake tastes weird. 

This cake is definitely very easy to do and low in sugar as compared to other standard recipes. However, I doubt if the calories will be lower due to the involvement of nuts. 


Saturday, September 26, 2015

Heavy Chocolate Mud Cake (My Style)

Dad's 60th birthday cake 
- Heavy Chocolate Mud Cake (My Style) 


7 inches round removable bottom cake tin

INGREDIENTS
[Chocolate cake base] 
A
4 egg yolks
20g sugar
60g Canola cooking oil 
60g milk (liquid) 
80g low protein flour (cake flour) 
15g cocoa powder 
1 teaspoon of Vanilla Essence 

B
4 egg whites
50g sugar
1/4 cream of tartar (I used approximately 1 teaspoon of Apple Cider Vinegar)

[Chocolate ganache] 
250g 52% Beryl dark chocolate  
126g whipping cream 
20g butter 

[Filing and Decoration] 
100g of pre-roasted walnuts and sunflower seeds
Honey 

STEPS
  1. [Preparing Cake] Whip egg yolk and sugar. Add in milk, Vanilla essence and oil. Mix well. Add in sieved flour and cocoa powder. Mix well to form the egg yolk batter. 
  2. Whip egg whites till huge bubbles are formed. Add in vinegar. Add in sugar in 1/3 proportion at each time. Whip the egg whites till stiff peak (sharp pointy edge). Your egg white batter is done. 
  3. Scoop 1/3 of egg white batter into the egg yolk batter and fold in using the scrape and fold method with a whisk/spatula. Continue mixing everything carefully and slowly until the cake batter is formed. 
  4. Pour the cake batter into the cake tin. Give a few knocks on the table before inserting it to be baked in a preheated oven at the bottom rack 140 degree Celsius with bottom fire only for 20 minutes. Then, switch the fire mode to top and bottom fire and continue baking for another 10 minutes. Change the temperature to 150-160 degree Celsius and continue baking for another 30-40 minutes until completely cooked. 
  5. Overturn the cake on a cooling rack and let it cool before you take out the mold from the cake. 
  6. Slice the cake into 3 layers. 
  7. [Prepare chocolate ganache] Melt all ingredients for chocolate ganache using double boil method. When 3/4 of the chocolate is melted, switch off the fire (use low-fire). The remaining heat will melt the chocolate completely on its own. This is important so not to over-heat your chocolate. Leave cool to be used later. 
  8. [Assembling the cake] Place the first layer of cake on the cake board. Apply 1/3 to make a layer of slightly thicken (still kind of watery but won't slip off everywhere) chocolate ganache. Sprinkle walnuts and sunflower seeds (pre-roasted). Place the second layer of cake. Repeat with chocolate ganache spread and nuts sprinkle. Place the third (last) layer of the cake and coat the whole cake with the remaining ganache. Top with remaining walnuts and sunflower seeds as decoration. 
  9. Chill the cake in the fridge for a couple of hours. 
  10. [Before serving] If you are serving this cake for people who have sweet tooth, it is better to drizzle some honey on top of the nuts before serving. This helps to give your cake a glossy shiny effect, giving a mouth-watering sensation. You can omit this if you prefer really bitter sweet kind of chocolate. 
It isn't captured close enough but I hope you can see how generous I was with the sprinkle of nuts - This is a must threat for people who love chocolate and a lot of nuts. 

Also, not to forget that this is really one of the easiest decorative cakes I've ever come up with. It took only 3 hours to complete the whole cake. 

Saturday, June 27, 2015

Opera Cake

The Opera cake - for this year Father's Day celebration. I am not too fancy about this cake as.. hmm I don't know. I just don't quite like it. It looks luxury, not buttery at all even though the frosting is buttercream.


Opera Cake
Source: HsHsVi


8寸方摸 

杏仁蛋糕体(我自己的食谱蛋糕体)
材料A
5蛋黄
70克牛奶
60克玉米油
50克杏仁粉
110克低筋粉
半小匙Vaniila Paste
材料 B
5蛋白
70克砂糖
少许塔塔粉 / 数滴柠檬汁
做法
*一般戚风做法
咖啡糖浆 (取至网络食谱)
65克水
60克白糖
1 ½ tbsp. 浓缩咖啡粉 espresso (我用 Nescafe 粉)
2 tbsp Kahlua 咖啡酒
*做法~ 糖 +水煮开搅拌糖溶化,加入咖啡,十分钟后好加入咖啡酒 拌均 过滤 备用。
咖啡牛油糖霜 (取至 Chiew Mei Lee 分享食谱)
250克无盐牛油 (我选用金桶牛油)
125克糖粉过筛 (我用 100 克)
2大匙热水与半小匙咖啡粉拌均
*打至松发。
中间夹层 Ganache
125克苦甜黑巧克力
63克动物性奶油
10克牛油
*隔水煮溶。
最后一层的淋面Opera Glaze
125克苦甜黑巧克力
63克动物性奶油
10克牛油
*隔水煮溶。(温度不能太热 也不能太凉)
做法~
1) 将杏仁蛋糕体 分割四片 每一片都是 1 cm。
2) 将第一片蛋糕体刷上一层咖啡糖浆,在涂上一层咖啡奶油霜。
3) 盖上第二片蛋糕体,再刷上咖啡糖浆,再涂上咖啡奶油霜,在淋上中间夹层 Ganache。
4) 再盖上第三片蛋糕体,同样刷上咖啡糖浆,涂上咖啡奶油霜。
5) 盖上最后一片蛋糕体 ,同样刷上咖啡糖浆,涂上咖啡奶油霜。
6) 放进冰箱半个小时以上,再淋上最后的 Opera Glaze。
7) 放进冰箱凝固后 把旁边蛋糕四边切除。
8) 完成。。。。