. . . . S T A T U S
Mood : so-so
Tomorrow will be my n times of driving lesson. Uncle said that he is going to prepare me for Pra test this end of month. Hu-hu! I hope everything goes on well.
I did meringue last year. *Wow, that is crazily long to mention now* Here are some photos to be shared. I seriously do not remember where I have chucked the recipe to. I'm just gonna show some photos and get you a simple recipe from the net.
NOTE : The recipe shown below is not the recipe I have used. It's just a guideline.
French Meringue
Ingredients
2 large egg whites
Half cup sugar
1 teaspoon of vanilla extract
Utensils
Electric mixer (Necessary)
Big bowl
Baking tray
Grease paper (Substitute it with aluminium foil)
Pipping tool (Use plastic bag for piping / spoon to shape the meringues)
Spoon
Knife (To get the meringues up)
Be careful!
- Do not get your meringues out immediately after they are cooked.
- Do not do this in a humid day (raining day). The meringues melt easily when the room temperature is low.
- You MUST get a grease paper / aluminium foil as the lining between the meringues and baking tray.
- Do not cook the meringues on high heat.
- The sugar amount in this recipe results in really sweet meringues. Adjust the amount according to how sweet you want your meringues to be.
1. Preheat oven to 100 degrees Celsius.
Ignore whatever inside there.
It should be empty.
I'm just showing you the oven.
Preheat it.
2. Place the grease paper/aluminium foil on the baking tray.
3. Prepare ingredients.
You only need 2 main ingredients.
Half cup of sugar
2 large egg whites
4. Beat them up!
Beat the egg whites and sugar together at a moderate speed.
Do this about 5 minutes.
5. Slowly increase the electric mixers' speed.
Beat the mixture.
Ngunnnnggggg..........
6. Add in 1 teaspoon of vanilla extract.
Stop when you want to add in the vanilla extract.
Continue beating the mixture after you have added.
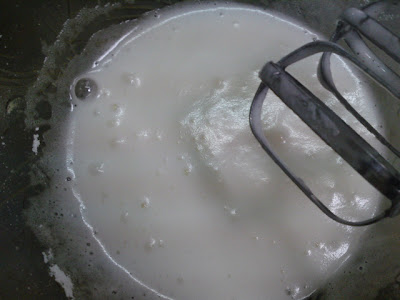
7. Check the mixture's consistency.
First, use the electric mixer to check the consistency.
If it does not fall off, then it is done.
If it is still watery, continue beating it.
8. Use a spoon to check.
See? This is what I meant by "stays on" and "does not fall down".
The consistency is just nice there.
9. Shape your meringue! Fun part!
These are the few done ones.
Try to experiment a few before putting them up to be baked on the tray.
Remember to lay an aluminium foil or grease paper before putting your meringue on the baking tray.
It will STICK on the baking tray if you do not have a grease paper/aluminium foil as lining.
This is the little piping tool that I use to shape my meringue.
First, uncap the top, put in the suitable nozzle, then fill in the body of the piping tool with meringue.
Use a spoon, small spoon, of course.
See? My nozzle is on.
The cap is uncapped.
Now it is full.
Stop stuffing in the meringue cream anymore.
It will overflow.
Now put on the cap and try to inject a few out in the big bowl of meringue cream.
Please be sure that you fill the pipping tool FULL so that when you push down the piston, the cream injected out will be smooth and not gassy.
10. Bake them!
Put them at the centre of the oven.
Bake them for 45 minutes.
Do not open the oven door too many times.
Once the meringues are cooked, leave them in the oven for a while.
Do not get them out immediately.
11. Baked!
Ta-daaaa........!
Get a knife to get the meringues up.
Do it quick or else they will stick on the aluminium foil!
Be careful.. Cooked meringues are pretty sticky (depending on the humidity of the room).
The more humid the room is, the quicker the meringues turn sticky (melt).
12. Storage.
Keep them in air tight container or else you will find your meringues turn soft and sticky.
They will melt, just like marshmallow.
You care store it up to a few weeks.
Meringues taste like melted ice cream in your mouth when it gets contact with saliva.
The best description is melted marshmallow.
Enjoy.


No comments:
Post a Comment